Showing posts with label 2014 Quilts. Show all posts

Monday, January 26, 2015

February Quilts

So after mentioning my two Valentine-ish quilts in Friday’s blog post, I thought I would pull them out of the archive and let them have their day in the spotlight again- since February is a measly 5 days away and all.

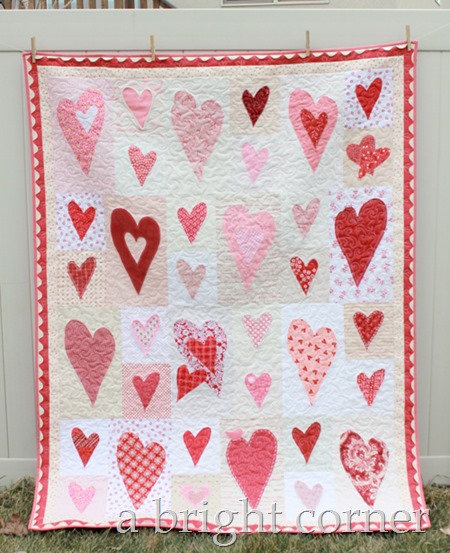
Friendship Heart quilt

This first quilt is one of my favorites because it was mostly made by some friends!  We did a friendship heart block swap last year with a quilt group I attend and this was the result.  I originally blogged about it last February and you can read it here. 

Two of my favorite things about this quilt (besides the personalized hearts made by my friends) are the soft flannel on the back, and the wide ric rac I used as part of the border.  It was so easy to add, and I just love the look of it.  I had never tried that technique before!

Friendship Heart quilt

My second Valentine-ish quilt is this one – called Sweet Talk.  I made it last year in March and blogged about it once but never showed the finished quilt.

  Sweet Talk quilt pattern

This is made using my Sweet Talk pattern (available for purchase here and here.)  It’s my third Sweet Talk quilt that I’ve made, and my most favorite!  For this version I used fabrics from last year’s “Surrounded by Love” line from Moda. 

Sweet Talk quilt pattern

Right now it’s hanging in my local quilt shop for the month of February, but I get to stop by and visit it every now and then.  So now between my Cupid’s Arrow pillow and my friendship heart quilt on the quilt ladder, my home is starting to feel a bit more ready for February!

Wednesday, December 3, 2014

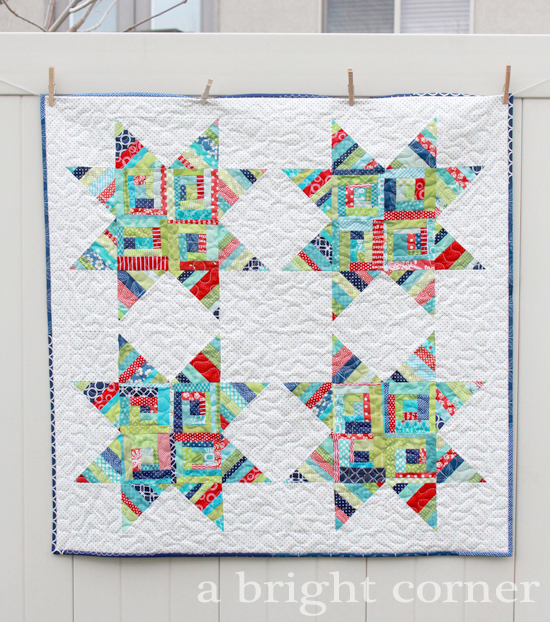
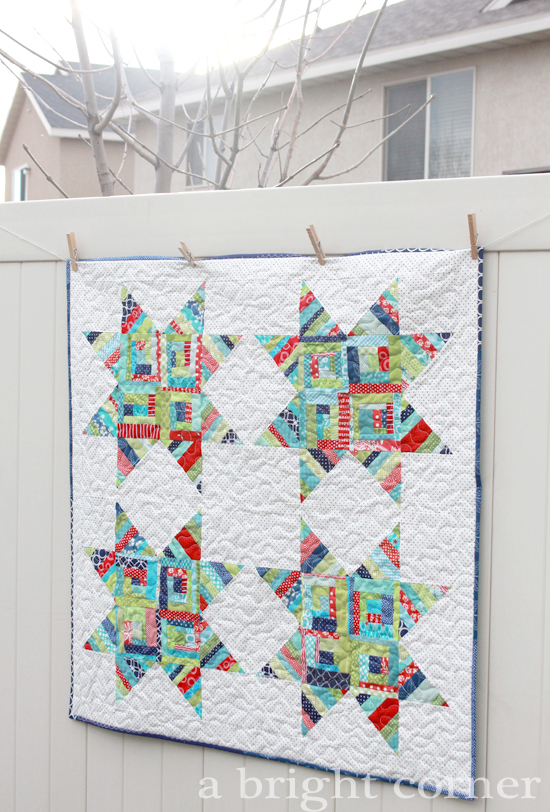
Twinkle Toes–a string block star quilt

 So a couple of days ago I introduced you to the new Simply Strings book by Rana Heredia and today I wanted to show you my finished project from the book.  This is Twinkle Toes! 

Twinkle Toes Quilt


The finished quilt measures 41” x 41” and is made up of two different types of string blocks – what Rana calls “random string blocks” and “classic string blocks”.  In the past when I’ve made string blocks (like for this quilt) I just used regular printer paper for my foundation.  This time I wanted to try a new (to me) product called Stitch n Sew EZ Print Quilt Block Sheets.

Stitch n Sew EZ Print Quilt Block Sheets

Each sheet measures 8.5” x 11” which fits nicely into your home printer.  If you need to print out your foundation pattern you can do it right onto the sheet.  In this case, I needed both 5” and 5.5” squares so I just cut the sheets down to size.  You can see in the photo below how thin each sheet is, and how easily you can see through it (that's important when you're doing paper piecing.)  However, when you’re working with it, it doesn’t FEEL thin.  It’s sturdy, yet flexible and easier to sew through than my usual paper is. 

Stitch n Sew EZ Print Quilt Block Sheets

As you add each layer to your string block you press each one in place.  The foundation sheets cause no problems here either.  In fact, sometimes when I use paper I find that the paper can tear away from the back before I want it to, which can cause problems when trimming and squaring up the blocks.

colorful string blocks

As I was making this quilt, I would sit for awhile and make quite a stack of blocks before heading to the cutting table to trim them down.  It really sped up the process.

scrappy string blocks

Then later I sat and watched some classic Star Wars with my boys as I tore off the foundation papers.  They tore easily and neatly, leaving no bits behind like paper can sometimes.

string blocks

Once I had all of the blocks made, I was ready to put together the quilt top.  It was such a fun quilt to make – I really wish I would have added a few more blocks to make a throw size!

scrappy string stars

Here's one of the finished blocks.  The dot print used as the background is Essential Dots from Moda (Black on white yardage) and is one of my favorite low volume background prints.

scrappy string star block

As I finished the quilt, I thought it was just begging for a binding that was as fun and scrappy as the top was.  To bring some order to the chaos, I chose to just use all blue scraps.  Perfect - just the look I was going for!

scrappy star blocks

Would you like to make your own Twinkle Toes quilt?  There’s still time to enter the giveaway to win your own copy of Simply Strings!  To enter, click here to leave a comment on my last post (any comments left below are welcome, but will not be entered into the giveaway.) 
Giveaway now closed!


Scrappy Stars quilt


Monday, November 24, 2014

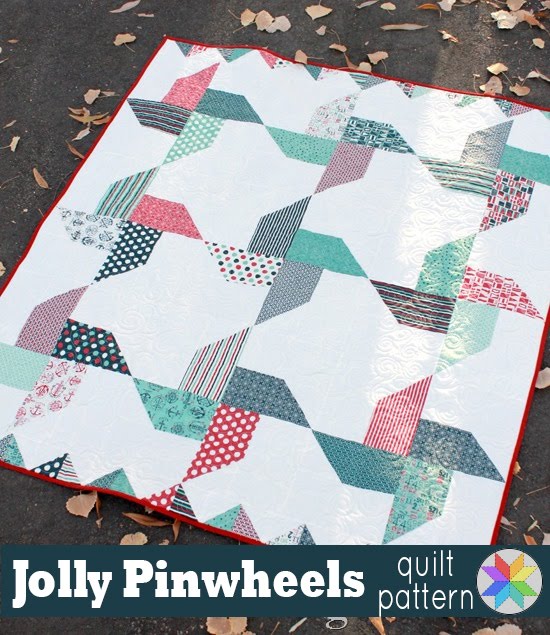
Jolly Pinwheels–a Jolly Bar free quilt pattern

Jolly Pinwheels free quilt pattern by Andy of A Bright Corner - perfect for Jolly Bars or a Layer Cake

Have you heard about the new Jolly Bar precut?  The Jolly Bar is a 5” x 10” precut that is exclusive to the Fat Quarter Shop.  You can see all of the Jolly Bars available here.  I got the chance to play with this Boathouse (by Sweetwater) Jolly Bar last week and see what fun idea I could come up with.

Boathouse Jolly Bar

Before I show you the finished quilt, I want to show you these fabulous Boathouse fabrics.  I’ve always loved nautical prints and colors and this line is right up my alley.

Boathouse Jolly Bar

The quilt I designed is called Jolly Pinwheels and I’ve created a free downloadable (and printable) pattern as well!  The finished quilt measures 57” x 63.”  It was fun to work with a precut that fell between the charm pack and the layer cake.  Sometimes I find that the charm square is too small for what I want, and the layer cake is just too big.  It's nice to have another option now!

Jolly Pinwheels free quilt pattern by Andy of A Bright Corner - perfect for Jolly Bars or a Layer Cake

The Jolly Pinwheels pattern shows a fast and easy way to make the half square triangles (used on the top and bottom borders) at the same time you’re making the blocks.  

Jolly Pinwheels free quilt pattern by Andy of A Bright Corner - perfect for Jolly Bars or a Layer Cake

I wanted to give the appearance of wind swirling around the pinwheels so I quilted it with all over swirls.

Jolly Pinwheels free quilt pattern by Andy of A Bright Corner - perfect for Jolly Bars or a Layer Cake

My youngest son and I went down to the lake near our house the other day to see if it was frozen yet (and to throw rocks, of course!) and I brought the quilt along to get some photos.  It was such a gorgeous, clear day and the water was so perfectly calm.  

Jolly Pinwheels free quilt pattern by Andy of A Bright Corner - perfect for Jolly Bars or a Layer Cake

The harbor area was a bit frozen – the smaller rocks we threw sat on top of the ice, but larger rocks smashed right through with a very satisfying sound.  We had a fun hour down at the lake and honestly if you're needing to take photos of a nautical quilt you really should head to the nearest body of water, right?  

Jolly Pinwheels free quilt pattern by Andy of A Bright Corner - perfect for Jolly Bars or a Layer Cake

You can find the free pattern here  or print it right from the window below.  If you make a Jolly Pinwheels quilt I’d love to see it!  To see the other Jolly Bars available, click here.  Would you like to win one?  The Fat Quarter shop is giving away a Jolly Bar to one of my lovely readers!  To enter the giveaway for a Jolly Bar of your choice, just leave a comment below.  Any ol' comment at all.  That's it!  Giveaway will be open until Saturday, November 29th at midnight.  I'll announce the winner here on Monday Dec 1st.

Giveaway is now closed -thank you!  


Be sure to stop by and see the other Jolly Bar quilts created by some other blogging friends:

Amy from Diary of a Quilter
Dana from Old Red Barn Co.
Denise from Pieced Brain
Vickie from Spun Sugar Quilts
Lorna from Sew Fresh Quilts
Stephanie from The Modern Sewciety

Friday, November 14, 2014

A New Home for a Whirled Quilt

In the past few days I’ve been trying to get some flower blocks done that will be used in a block swap this weekend.  I intended on showing those blocks in today’s blog post but when I went to take the photos, I discovered that my camera battery was completely drained.  Doh! 

So instead I have some photos of a quilt I finished last month and never got around to blogging about.  In October I made two quilts from my Whirled quilt pattern.  I showed the first one here. 

Whirled quilt

This second one was made simply because I fell in love with the fabric in the border.  I mean come on!  It’s pretty, isn’t it?  I think I’d love a whole cloth quilt made from this!

In My Room fabric by Jenean Morrison for Free Spirit

This print is from a line called “In My Room” designed by Jenean Morrison for Free Spirit.  I found it one afternoon as I was browsing in a local shop that I don’t visit very often.  I immediately fell in love with it! 

Whirled quilt

I found several fat quarters to pull in the pinks, greens and peachie colors from the border.  The gray dot for the inner border and binding were a bit trickier, but I love what I ended up with.

Whirled quilt in pinks

The finished quilt measures 50” x 64.”  I quilted it with a meandering loop pattern with a few double loops thrown in – one of my favorite all-over quilt designs.  And this pretty little quilt has found a new home!  One of my sisters has claimed it and it is on it’s way now to Northern Idaho. 

Whirled Quilt in pinks

For more information about the Whirled quilt pattern, you can see this blog post.  The pattern is available in my pattern shop here.

Thanks for stopping by, and I hope you all have a great weekend!  (hooray for Fridays!)


Thursday, October 30, 2014

Stair Steps–quilt pattern tutorial

In the past couple of days I've received a lot of questions about how I made my bonus project from the Fat Quarter Shop's Fat Eighth Frenzy quilt pattern.  So I wrote up a quick tutorial to show you how I did it.  

The technique is a pretty handy one to keep in your toolbox of quilty ideas!  I remember a little over a year ago I was admiring an intricate-looking quilt top at a local shop and the woman who made it kindly explained this technique to me.  I've been itching to use it ever since.

Stair Steps quilt tutorial

Stair Steps quilt tutorial 
47" x 48"

You will need:
leftover triangles from the Fat Eighth Frenzy quilt pattern (at least 60 triangles)
1/3 yard for the inner border
3/4 yard for the outer border
3/8 yard for binding
3-1/4 yards backing

First of all, take all of the leftover triangles from the Fat Eighth Frenzy quilt.  Pair them together so there is good contrast between the two (i.e. light / dark or solid / print).  Sew the two triangles together and press open to make one half square triangle. 

Stair Steps quilt tutorial

Trim the half square triangles.  Mine were all about 8” (give or take a bit) so I trimmed them down to all be 7.5”.  My big Bloc Loc ruler makes quick work out of trimming HSTs!

Stair Steps quilt tutorial

You’ll need 30 trimmed HSTs for this project.  If you have fewer HSTS, you could make a smaller quilt, a table runner version or even a throw pillow. 

Stair Steps quilt tutorial

Next, cut each HST into three equal strips of 2.5” each.  Keep in mind that the direction of the HST will matter in the end!  Cut half of the HSTs facing in one direction and the other half facing the other direction, as shown in the diagram below. 

cutting diagram


Now working with the strips from just one of the sliced up HSTs, leave the center strip where it is and swap the two end strips.

Stair Steps quilt tutorial


Stair Steps quilt tutorial

Using a 1/4” seam, sew them back together.  This block should measure 6.5” x 7.6”.  Repeat these steps to make all 30 blocks. 

Stair Steps quilt tutorial

Layout all of the blocks as you would like them.  This was one layout that I considered, but in the end I went with this one below (five blocks in each row, six rows, blocks laid horizontally with peaks and valleys matching up.)

Stair Steps quilt tutorial

Sew the blocks together into rows, and then sew the rows together. 

Time for borders!  Measure the length of two sides and the length through the center of the quilt.  Find the average of that number and cut two inner border strips to be 2.5” by the average length.  Sew those to the sides of the quilt top.  Next measure the top and bottom of the quilt as before, cut inner border strips to that length (and 2.5” wide) and sew to the top and bottom of the quilt top. 

Repeat to add the outer border.  The outer border should be cut at 5” x average length.  Baste, quilt and bind as desired!

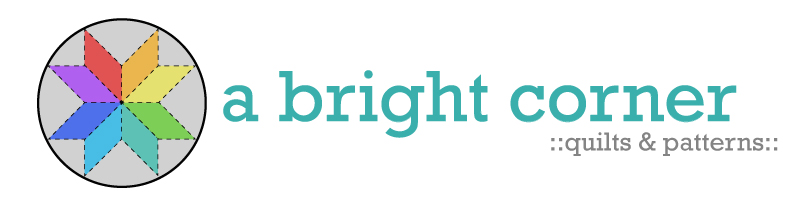
Stair Steps quilt tutorial

If you make your own Stair Steps quilt I’d love to see it!  Tag me on Instagram (abrightcorner), shoot me an email or add your photo to the Sewing with A Bright Corner flickr group.
Stair Steps quilt tutorial

Tuesday, October 28, 2014

Fat Eighth Frenzy–free quilt pattern!

Wow – what a weekend!  I just returned home from Fall quilt market and once I get a chance to unpack my bags and take a nap or two I’ll share some photos of all the pretty things with you.

Today I have a free quilt pattern to show you!  The Fat Quarter Shop has created this Fat Eighth Frenzy quilt pattern and asked if I would make a Fat Eighth Frenzy quilt using a bundle of Elementary (by Sweetwater for Moda).  I love this line, but let’s be honest… I love pretty much everything that Sweetwater does.

Fat Eighth Frenzy

This pattern is a fun, quick way to use those fat eighth bundles!  Really – all you need is one fat eighth bundle (one with at least 30 F8 pieces) and a bit of yardage for the binding and backing.  The quilt finished at 48” x 56” which is a great size to throw over the arm of a chair or the back of a sofa.  If you need smaller or larger sizes, the pattern has them, from baby size to king!

Fat Eighth Frenzy


The Fat Eighth Frenzy pattern even comes with a free bonus project – which makes a cute half square triangle quilt that measures 34” x 41”.  The video for the bonus project is here.  I decided to use my leftover triangles in a little different way!

Here is my “bonus project”  -

Fat Eighth Frenzy

The center portion of the quilt is made using the leftover triangles from the Fat Eighth Frenzy quilt.  I then added a 2” inner border and a 5” outer border to frame it up and I had myself two quilts from one F8 bundle.  Nice!  This quilt measures 47” x 48” and I think for now it will live here as a wall hanging.

Fat Eighth Frenzy

It feels so good to use up leftover bits instead of throwing them away, doesn’t it? 


  unnamed


Friday, October 24, 2014

Scrappy Pumpkin table runner

Halloween is just a week away!  Every year I tell myself I’m going to pull out my Halloween décor the first week of October but then when the time comes, I don’t.  I just can’t bring myself to admit that it’s fall.  So here we are, on Oct 24th and not a bit of Halloween to be seen in my house!  Well, we do have two pumpkins on our front porch but that’s about it. 

So because of my Halloween décor procrastination, I decided to make a table runner that will work for both Halloween and Thanksgiving.  That way, I can use it now and leave it for another month.  Win/win.

Scrappy Pumpkin table runner tutorial

This Scrappy Pumpkin table runner is a tutorial today over on the Therm O Web Blog (click on the photo to go to the tutorial).  It’s a great way to use up some of those scraps!  My orange scrap bin was a little lacking so I had to cut into my orange stash too.

To make the pumpkins there is a printable page as a part of the tutorial and you can just print that on to three sheets of HeatnBond EZ Print sheets straight from your computer’s printer.  Pretty nifty.  You CAN use regular HeatnBond Lite, but by using the EZ Print sheets you can skip the tracing step – my least favorite part of using fusible webbing. 

Scrappy Pumpkin Table Runner tutorial

I made this to fit on my little blue bookcase in my dining room.  I have a hard time deciding just what to put there sometimes. 

Scrappy binding

I think my favorite part of the runner is the scrappy binding!

scrappy pumpkin art

As I was first designing the table runner, I made one test block with a print as the background instead of the solid white.  I loved it so much I put it in a frame!  That background print is from the Flutter line of fabric designed by The Quilted Fish for Riley Blake.

Well, I guess I’d better go and get the rest of my Halloween decorations and just admit that it’s the end of October!


Friday, October 17, 2014

Division–a new quilt pattern

Happy, happy Friday!  Is anyone else celebrating the fact that it’s Friday, or is it just me?  Good heavens this was a long week!  First of all I just want to remind everyone to enter the Cascade fat quarter stack giveaway if you haven't yet.  You have until Monday to enter!

So today I have something exciting to share!  I’d like to introduce you to Division – one of my newest quilt patterns!  (Wow - I’ve only written 7 sentences and I’ve already used 5 exclamation points.  I’m super enthusiastic today, aren’t I?)

Division quilt pattern from A Bright Corner

Division is a jelly roll friendly quilt pattern, but doesn’t require you to have jelly rolls.  The fabric requirements are also given in yardage for those of you that prefer to choose fabrics that way.  And with the largest width of fabric required being just 2.5”, this makes it a great pattern to use up those fabric scraps!

Division has instructions for four different sizes – baby, throw, twin & queen.


Division quilt pattern from A Bright Corner

The quilt that I made for the pattern cover (in the image above) is the throw size and is made using some of my favorite fabrics from my stash. 

As I’m designing each pattern I like to go in to EQ7 and create a few different versions.  This one below is also a throw size, but using fabrics from Color Theory (a yet to be released line from Vanessa of V and Co.)

Division quilt pattern from A Bright Corner

and this version is the baby size with fabrics from a line called Moxi by Studio M for Moda.

Division quilt pattern from A Bright Corner


Printed patterns and PDF (instant download) patterns are available from my pattern shop here, and on Etsy here. 

If you are a quilt shop and are interested in a wholesale order of this or any of my other patterns, please email me [email protected].

Division quilt pattern from A Bright Corner


Division quilt pattern

As always, thanks for stopping by!  I thoroughly enjoy reading your sweet comments and emails.  Enjoy your Friday!


Related Posts Plugin for WordPress, Blogger...